Roblox, home to over 40 million user-generated games, offers an excellent platform for budding game developers to hone their skills and share their creations with a global audience. One powerful feature Roblox provides is the ability to create game passes, which can enhance gameplay and generate revenue for developers.
A game pass (also called an experience pass) is a purchasable item within a game that grants players access to exclusive content, such as special abilities, unique avatar items, or restricted areas. If you’ve already built your first Roblox game, adding a game pass can take the experience to the next level and make it more engaging for players.
In this guide, you’ll learn the steps to create a game pass on Roblox, which provides developers with beneficial features for compensation.
How to Create a Game Pass on Roblox
Step 1: Open Roblox
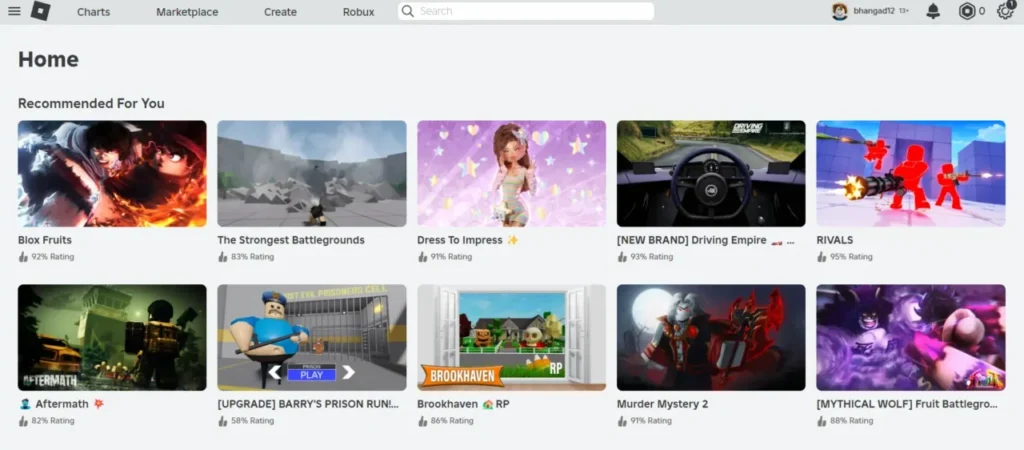
You can launch Roblox either via the Roblox app or directly through a web browser. Both options will lead you to the tools needed to create your game pass.
Step 2: Access the Creator Hub
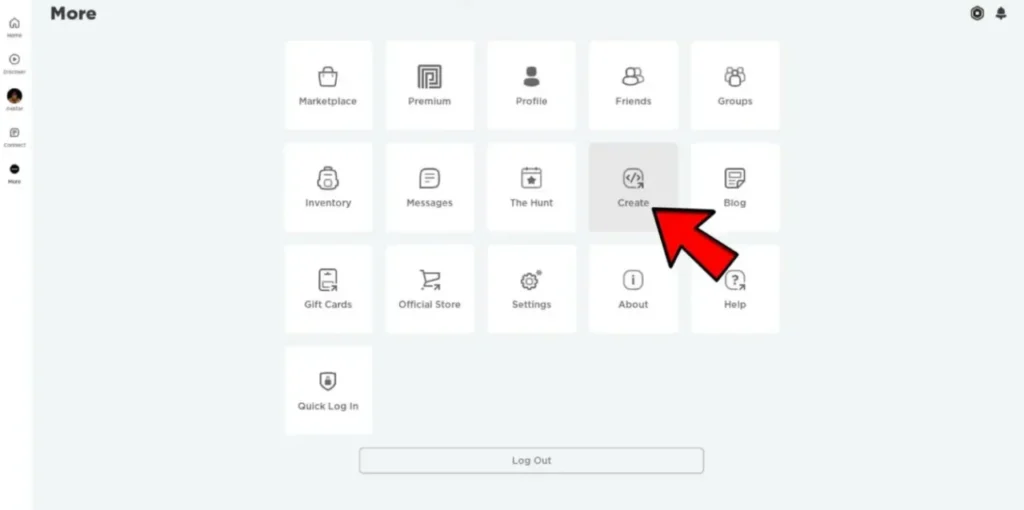
To begin, click the Create button located on the Roblox homepage to enter the Roblox Creator Hub. If you’re using the app, navigate to the More menu and find the Create option.
Step 3: Choose Your Game
Under the Experiences section, select the game for which you want to create a game pass. Click Manage Experience to open the game settings.
Step 4: Go to Passes
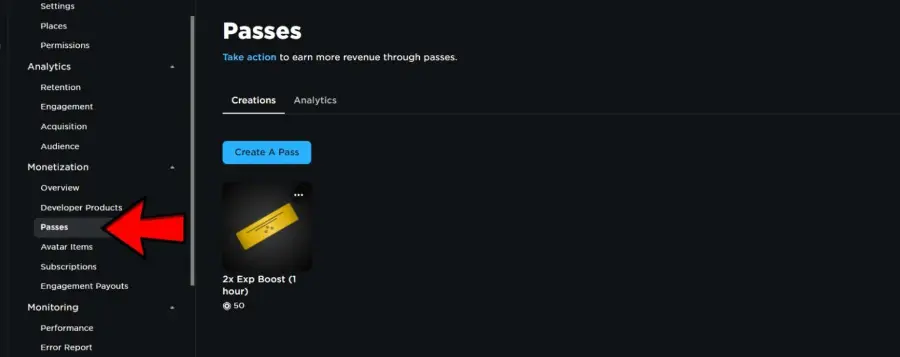
In the Content Settings section, go to the Monetization options and select Passes.
Step 5: Click “Create A Pass”
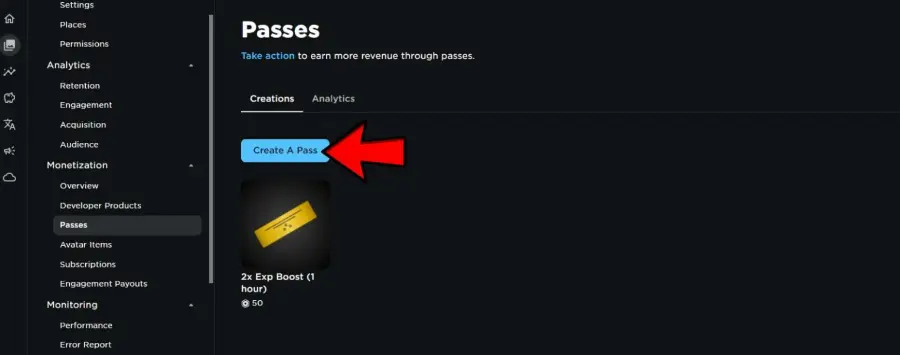
In the Passes menu, you’ll see two tabs: Creations and Analytics. To get started, click on Create A Pass under the Creations tab.
Step 6: Customize Your Game Pass
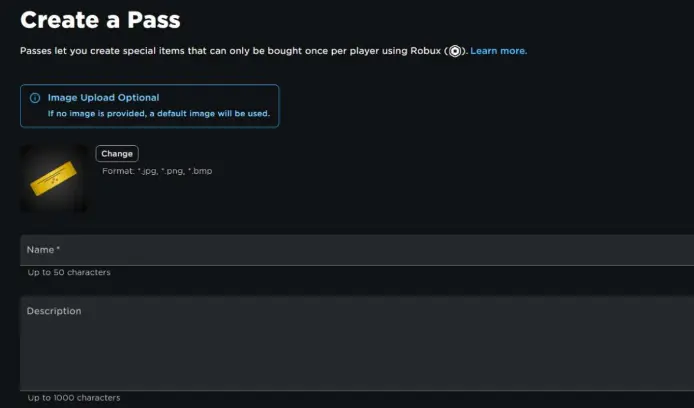
Here, you can personalize your game pass by giving it a name, image, and description. If you don’t have a custom image, Roblox will provide a default one. Once you’ve filled in the details, click Save Changes.
Step 7: Enable Sales for Your Game Pass

To start selling your game pass, open its basic settings. Under the Sales tab, enable Item for Sale to make it available to players.
Step 8: Set a Price

Decide how much you want to charge for your game pass, which will be sold for Robux, the in-game currency of Roblox. Developers earn 70% of the revenue from each sale. After setting the price, click Save Changes. You can view your newly created game pass by clicking the three dots on its image and selecting Open in New Tab.
Congratulations, you’ve successfully created your first game pass!
Key Tips for Making and Selling Game Passes on Roblox
- You must have an already published game to create a game pass.
- Always check if a player has purchased your game pass. Roblox requires developers to manually assign rewards, so regularly monitor your game’s script to ensure privileges are granted to pass holders.
- For more in-game integration, you can add codes to make game passes accessible through shops or NPCs in your game.
Creating game passes on Roblox not only makes your game more exciting for players but also gives you an opportunity to earn Robux, helping you grow as a developer. Start experimenting and see how game passes can enhance your creations!
